GIFs are everywhere. You can find them on all the most popular blogs like BuzzFeed, Reddit, Tumblr, and just about everywhere you look. GIFs make a post a little more interesting and let you say a lot about something without actually using words… but instead a witty GIF of a celebrity rolling their eyes or similar.
So when I was making a recipe for these gorgeous chocolate pancakes, I ended up taking quite a few pictures to try and get the “money” shot of the powdered sugar falling on the pancakes. I got the shot but I also had about 25 extra photos of powdered sugar falling on the pancakes. Instead of just deleting them, I decided to make a GIF and share it with my beautiful readers.
Now that I know how to make a GIF in photoshop, I figured I would share it with all of you! Then I’ll share a bonus on how to convert that GIF into a video so that you can share it on Instagram… since Instagram doesn’t allow GIFs yet. Stupid Instagram.
Anyway, creating a GIF is super easy and is just basically taking a few photos and stitching them together in different frames to create an animation. So for the purpose of this little tutorial, we will be recreating the GIF I made for the pancakes:
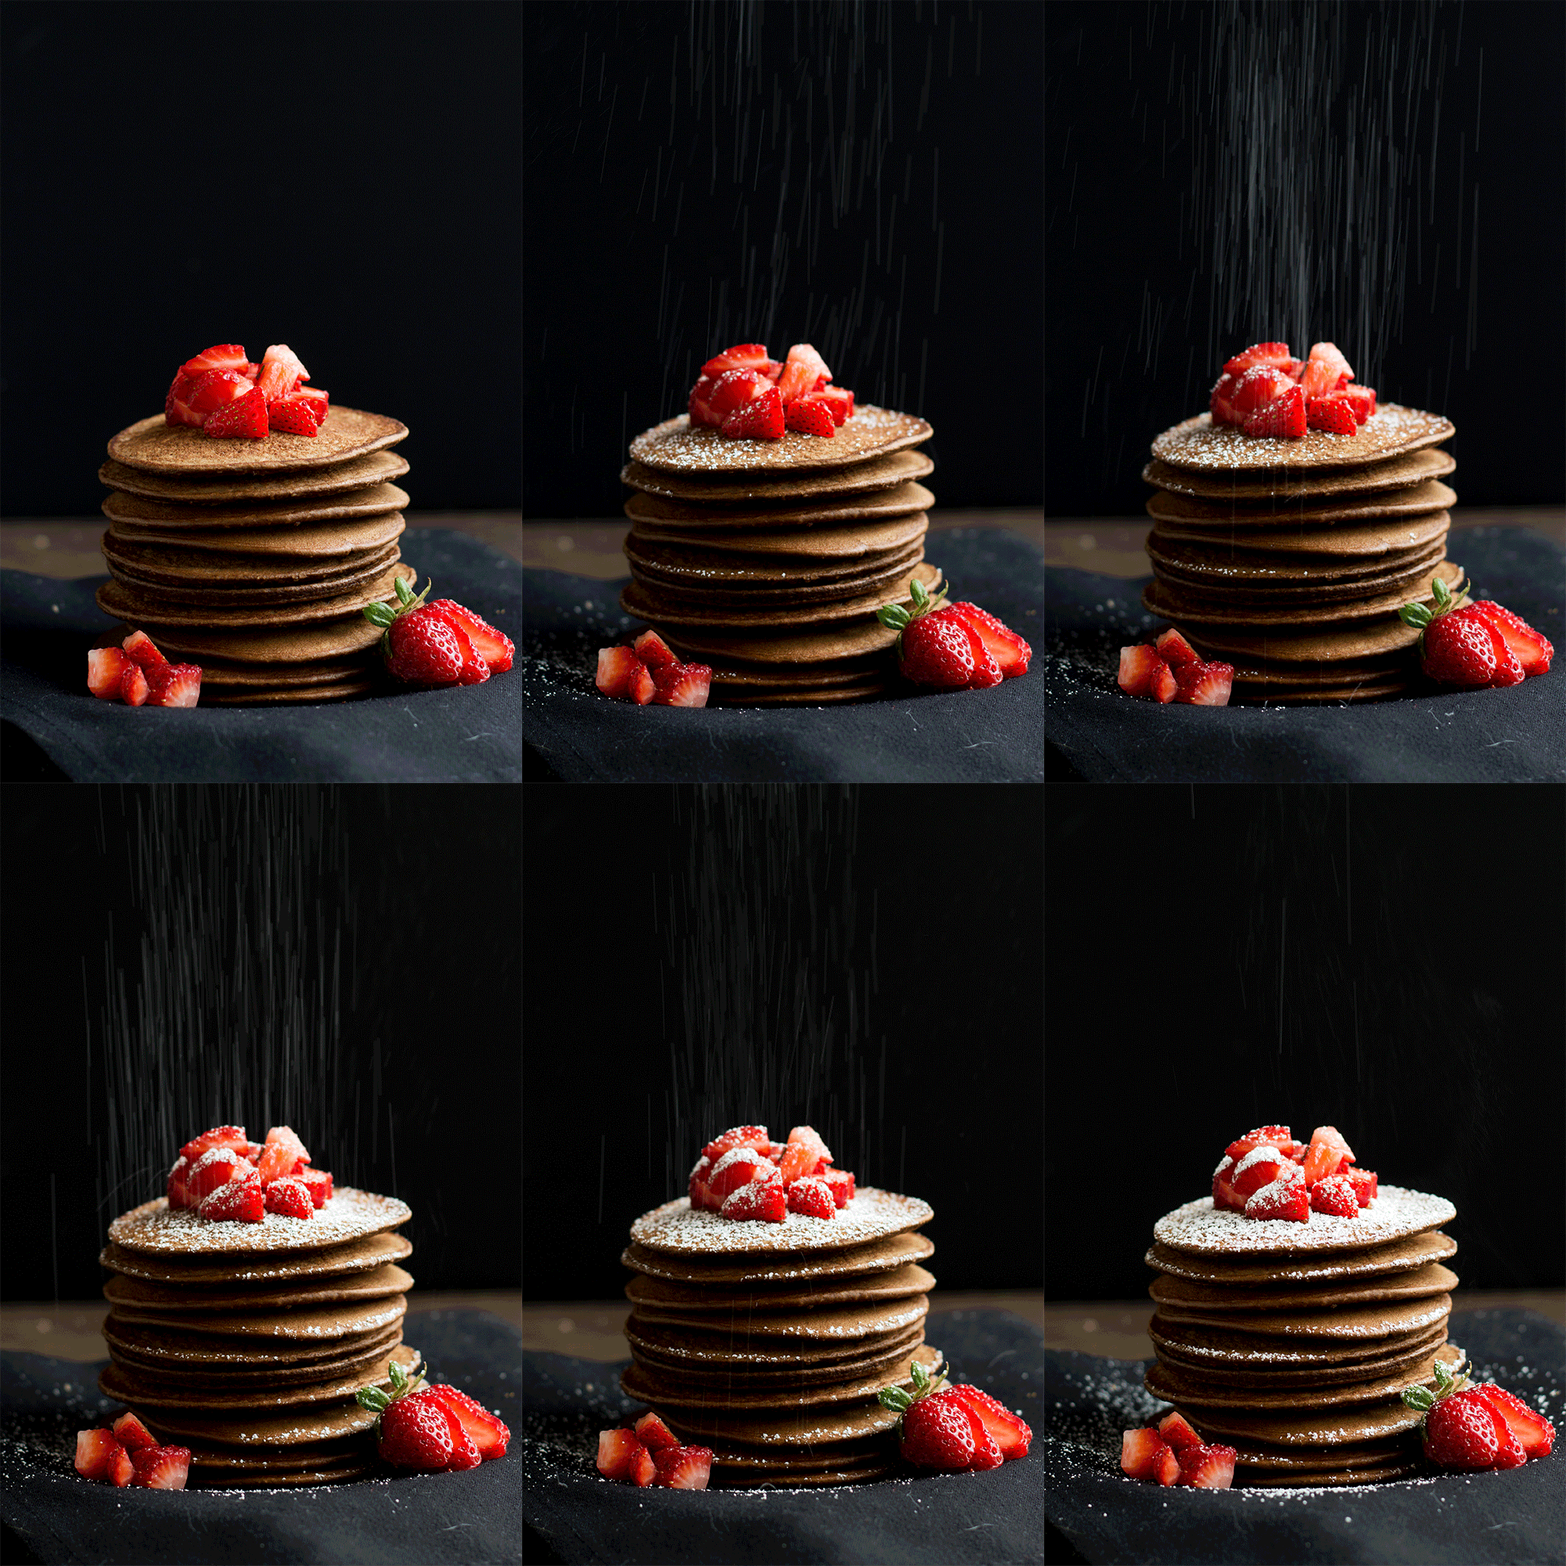
Isn’t that just magical? Haha… moving on.
This GIF is comprised of 14 images but you can really use as many as you would like. I wouldn’t recommend anything less than 4-5 for a GIF that is similar to this. So let’s get started!
Step 1: Get Images ready
Make sure that all of the images you want to use are edited and saved in a photo format, i.e., PNG or JPEG. If you would like, you can also save them into a separate folder. I put mine into a folder named “Make GIF”.
I know, clever.
Step 2: Import photos to Photoshop
Open Photoshop and go to File >> Scripts >> Load Images into Stack.
On the dialog box that opens you can either choose “Use: Files” or “Use: Folder” depending on if your images are saved to a separate folder or not. For this, we will use folder because of my handy dandy “Make GIF” folder and click Browse. Choose your folder and click Open and all of the files in the folder will be imported to the dialog box:
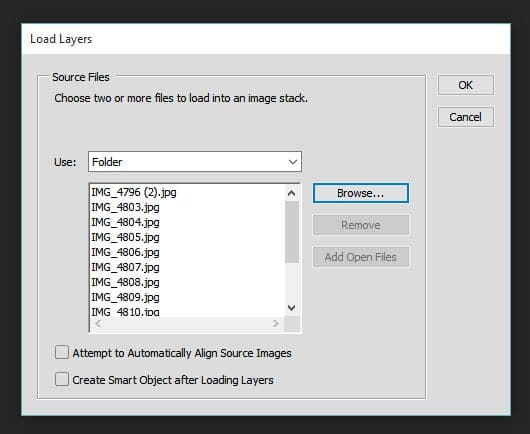
Alternatively, browsing for the files and selecting all of them will do the same thing.
Then just click ok and photoshop will import all your images into one file with each image as a separate layer, like this:
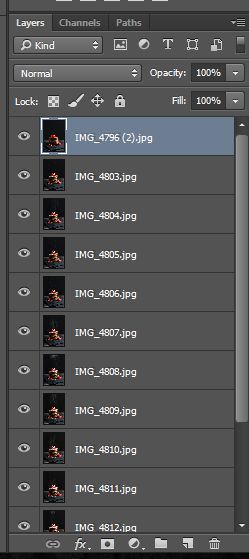
Now that we have all the images loaded into a stack, we can go a create our GIF.
Step 3: Create the GIF
You need to access the animation timeline to make the GIF, so go to the top and click Window >> Timeline. You will see a new frame open in the bottom of the window with a little box in the middle that says, “Create Frame Animation.” If it does not say that then click the little drop down next to it and choose “Create Frame Animation.”

Then click the “Create Frame Animation” button and and one of the images will show up in the timeline window.

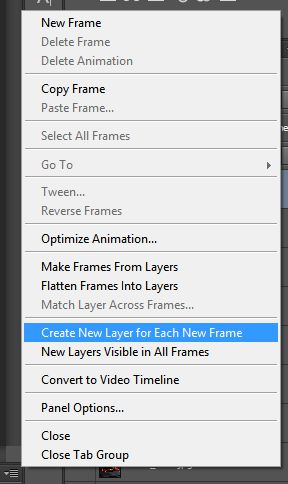
In the right-corner of the window there is a little drop down menu, click it and select “Create New Layer for Each Frame”
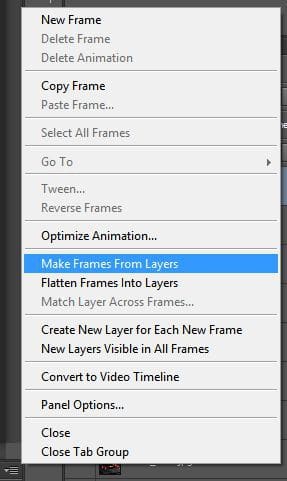
Nothing will happen after you click that, it is just so that when you go to add to the animation that all the layers you imported will be used as new frames for the GIF. Now open the menu again and click on “Make Frames From Layers.”
This will create a new frame for each layer that you have in the layers panel, like described above, and your timeline panel will have all of your images. If your images show up in reverse order, then just open the dropdown menu again and choose “Reverse Images” or if they are in the wrong order all together then just drag and drop into the correct order.

Now that we have all the images in animation frames, you can go ahead and click the little arrow below each images and choose the delay between each. For this I chose 0.5 seconds but you can choose from any of the options they have or add a custom duration by selecting “Other…”
There’s another drop down menu on the bottom-left of the timeline that says “Once” and controls how many times the animation should repeat. For a GIF, I would recommend choosing “Forever” as then it will loop infinitely just like all the GIFs you see out there.
After you’re done setting the time and choosing looping, click the play button to preview how your animation will look.
Step 4: Save your GIF
This is the final step in creating a GIF and the best way to save it is to select File >> Export >> Save for Web…
In the pop-open window you’ll select “GIF” as the format and then in a box right above that it will say “[Unnamed]” click that and select “GIF 128 Dithered.” Then click “Save” and save it to the appropriate folder.
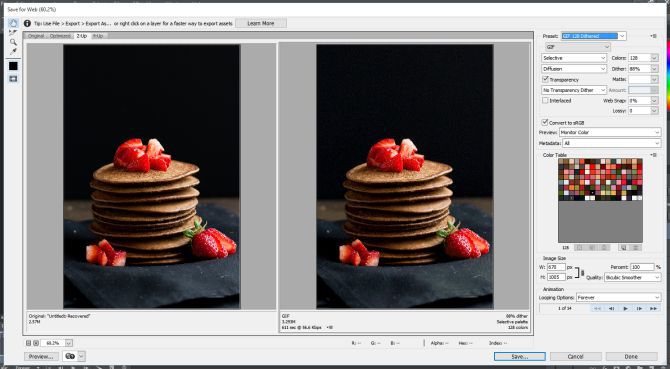
Now you can open the GIF to preview in your browser by opening a new tab in your browser and then clicking and dragging the file into the open browser tab.
Finished!
Now we want to take that GIF and create a video for Instagram, right? I mean, why not show the IG World your beautiful GIF of falling powdered sugar on pancakes or pouring wine to make a sangria?? Since we already have the GIF made and still open in Photoshop, all it takes is 2 more steps to create a video for Instagram.
Step 5: Crop your GIF
Since IG is mostly square images and videos, we need to crop our GIF to a square first… unless your GIF is already a square then you can just skip this step.
Step 6: Save Video
After you cropped your image go to File >> Export >> Render Video and a new dialog box will open up for the video settings. Name your file and select the folder that you would like it to save to and you can pretty much leave all the rest of the settings as default. Then click “Render”
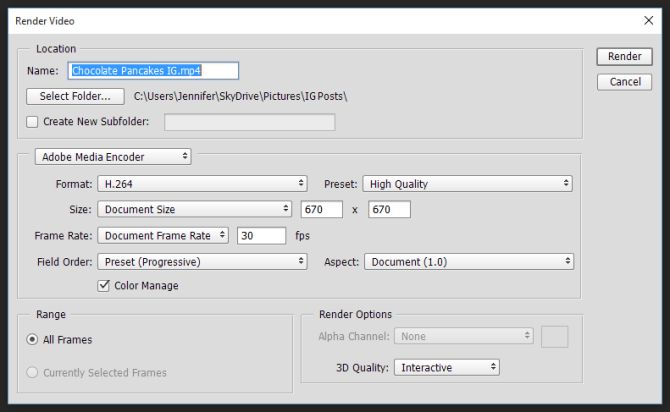
Finished!
After saving you can open the video and preview it to make sure that it is the way you want. Now just either email or upload your photo to OneDrive or DropBox to open on your phone and then post to Instagram per usual!

